Recording
Learn how to record and transcribe your voice using Vox's intuitive recording interface.
Recording Basics
Starting a Recording
There are two ways to start recording:
Method 1: Keyboard Shortcut
Press your configured recording shortcut:
- Hold mode (default:
⌘ + Space): Hold the key to record - Toggle mode (default:
⌘ + ⌥ + Space): Press once to start
See Keyboard Shortcuts for customization options.
Method 2: Tray Icon
Click the Vox icon in your menu bar to access recording options:
![]()
Recording Indicators
When recording is active, you'll see visual feedback in multiple places:
Tray Icon
![]()
The tray icon changes to show:
- Blue pulse animation indicating active recording
- Different icon state than idle mode
Idle state: ![]()
HUD (Heads-Up Display)
The HUD appears on your screen showing:
- Recording status
- Real-time feedback
- Audio level visualization
- Action buttons (when enabled)
Configure HUD appearance and position in Settings → General → HUD.
Visual Feedback
The HUD provides real-time confirmation that Vox is capturing your audio. If you don't see the HUD, check your HUD settings.
Stopping a Recording
The method depends on your recording mode:
Hold Mode:
- Release the keyboard shortcut key
- Recording stops immediately
- Transcription begins automatically
Toggle Mode:
- Press the keyboard shortcut again
- Recording stops
- Transcription begins automatically
Recording Feedback Sounds
Vox plays audio cues during recording:
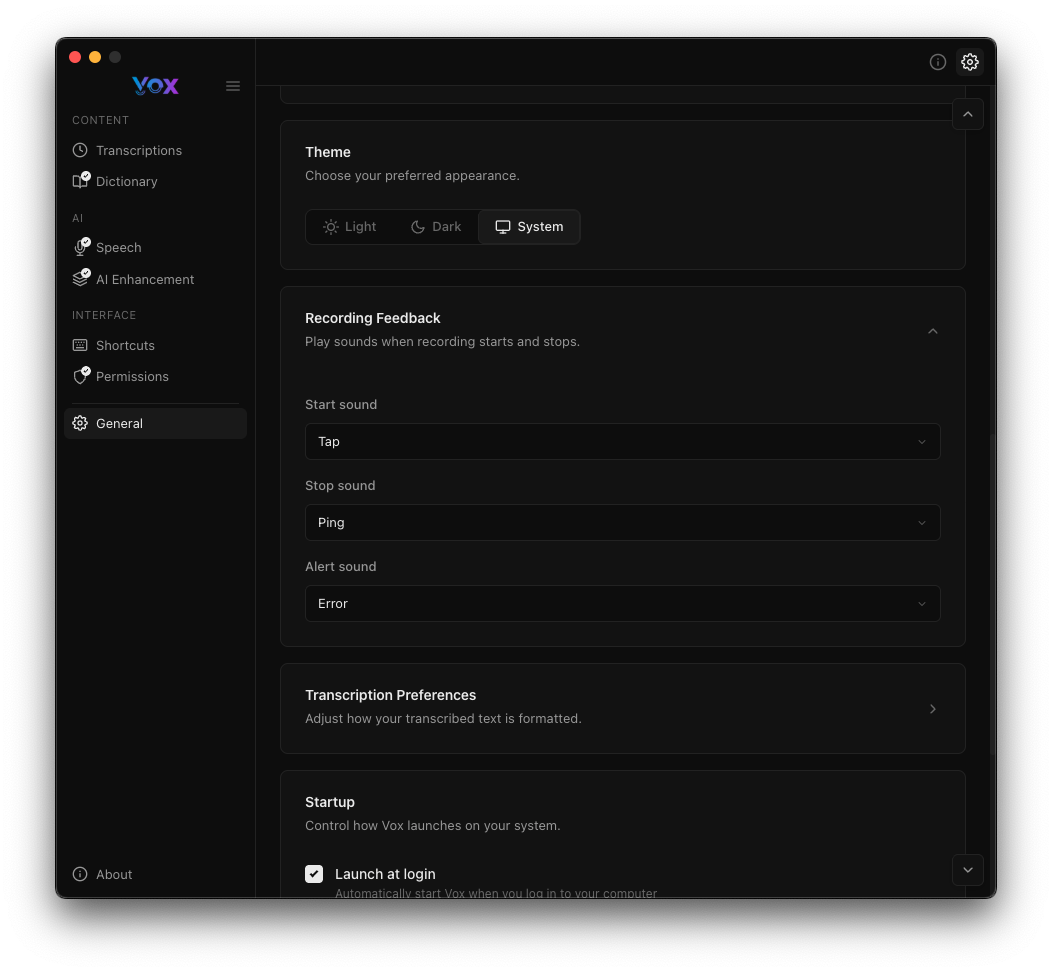
- Start sound (default: "Tap"): Plays when recording begins
- Stop sound (default: "Ping"): Plays when recording ends
- Alert sound (default: "Error"): Plays if an error occurs
Configure sounds in Settings → General → Recording Feedback.
Recording Workflow
Typical Recording Session
- Prepare: Position your cursor where you want the text to appear
- Start: Press your recording shortcut
- Listen: Wait for the start sound
- Speak: Say your message clearly
- Stop: Release (hold mode) or press again (toggle mode)
- Wait: Processing takes 1-5 seconds depending on your speech model
- Review: Transcribed text appears in the active application
Best Practices
Before speaking:
- Wait for the start sound before beginning
- Position cursor in the target application
- Minimize background noise
While speaking:
- Speak at a normal pace
- Enunciate clearly
- Pause naturally between sentences
- Keep recording under 60 seconds for best results
After speaking:
- Wait for the stop sound
- Allow a moment for processing
- Check transcription accuracy
Recording Length
For best accuracy, keep recordings under 60 seconds. For longer dictation, break content into multiple recordings or use Toggle mode with natural pauses.
HUD (Heads-Up Display)
HUD Appearance
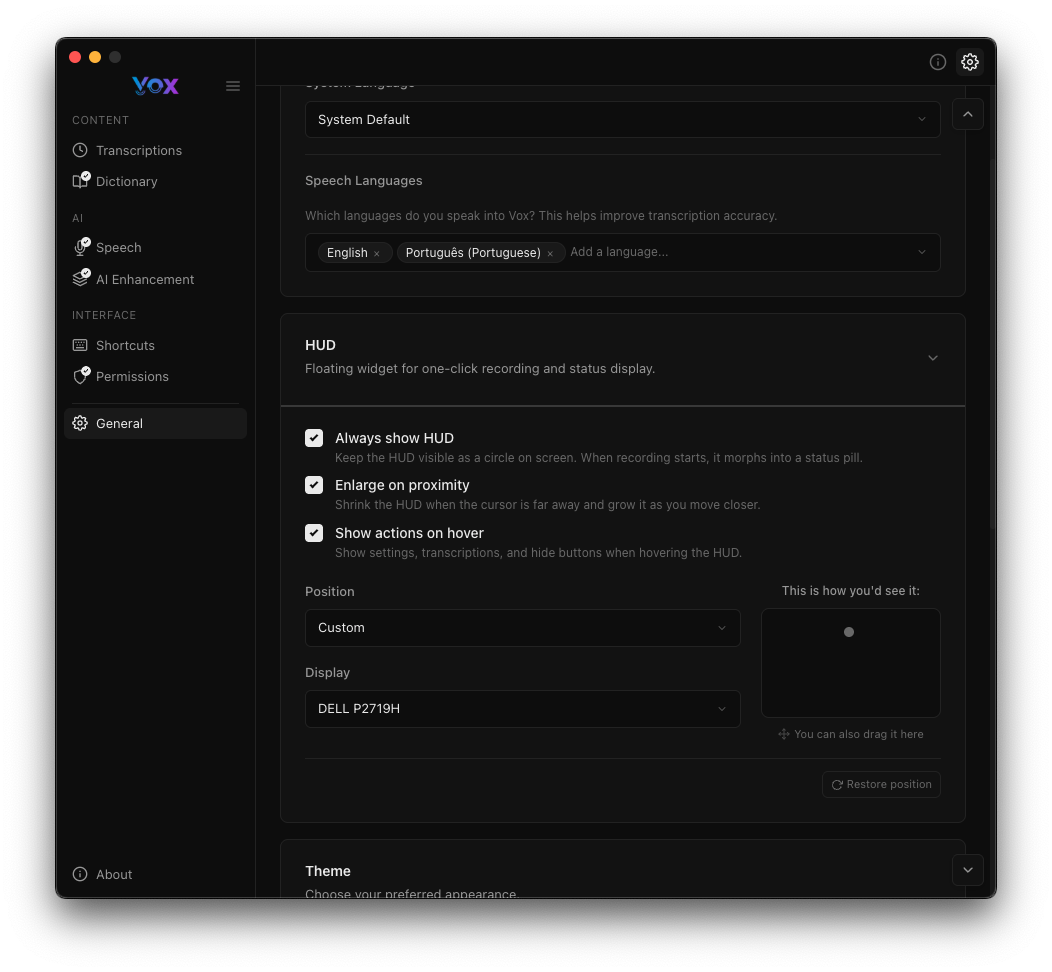
The HUD is a floating widget that shows recording status. Configure it in Settings → General → HUD.
HUD Options
Always show HUD
- Keep the HUD visible even when not recording
- Useful for confirming Vox is running
- Shows status at a glance
Enlarge on proximity
- HUD grows larger when cursor is nearby
- Makes it easier to see and grab if it's in the way
- Returns to normal size when cursor moves away
Show actions on hover
- Displays action buttons when hovering over the HUD
- Quick access to settings, transcriptions, and hide buttons
- Keeps HUD minimal when not in use
HUD Position
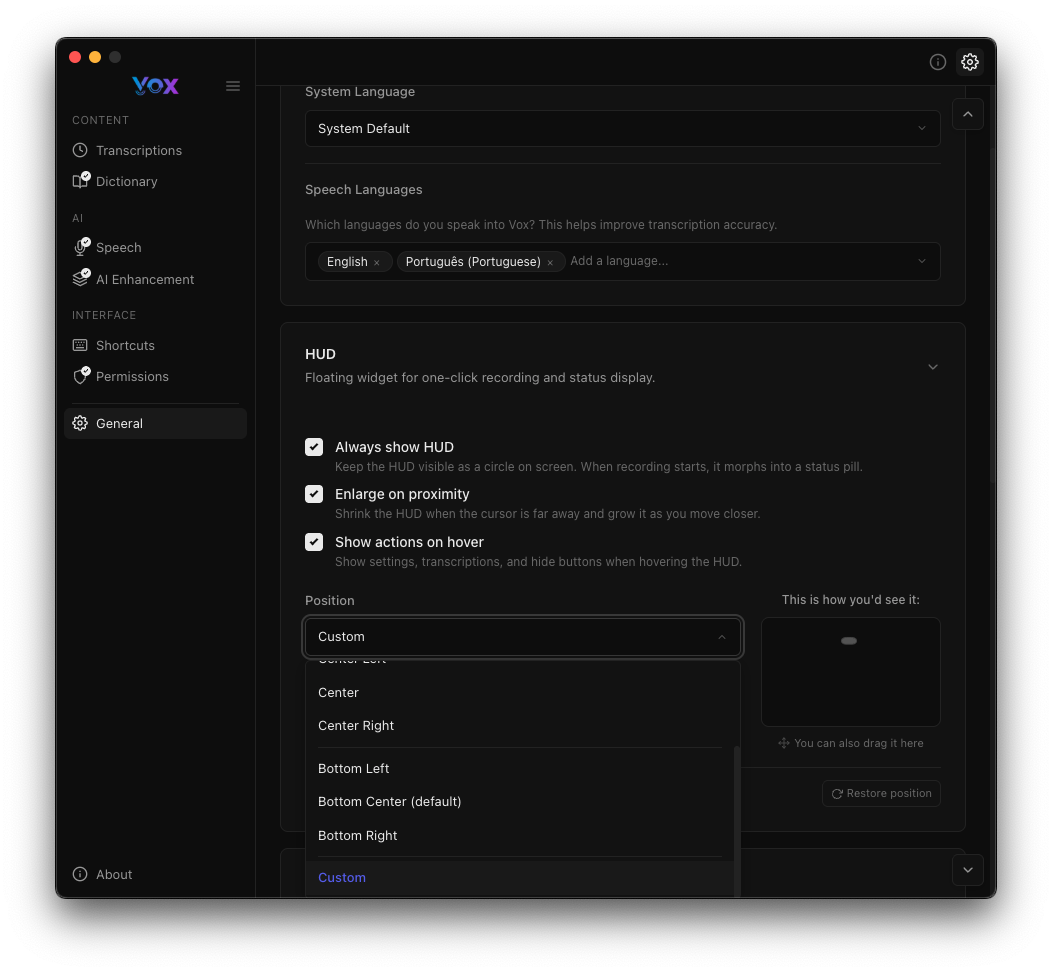
Choose where the HUD appears:
- Custom: Drag the HUD anywhere on screen
- Center: Middle of the screen
- Center Right: Right side, vertically centered
- Bottom Left: Lower left corner
- Bottom Center: Bottom middle (default)
- Bottom Right: Lower right corner
Display Selection:
- If you have multiple monitors, select which display shows the HUD
- Dropdown shows all connected displays
Positioning
Place the HUD where it won't interfere with your work. Bottom Center works well for most users, but adjust based on your workflow.
HUD During Recording
When recording:
- HUD shows recording animation
- Real-time audio level visualization
- Visual confirmation of active recording
- Timer showing recording duration
Tray Icon
Tray Icon States
Idle State:
![]()
- Standard Vox icon
- Indicates app is running and ready
- Click to open menu
Recording State:
![]()
- Blue pulse animation
- Indicates active recording
- Quick visual confirmation
Tray Menu
![]()
Click the tray icon to access:
- Open Settings: Navigate to settings panel
- View Transcriptions: Open transcription history
- About Vox: Version and update information
- Quit Vox: Exit the application
Quick Access
The tray menu provides quick access to all major features without opening the full settings window.
Recording Modes
Hold Mode
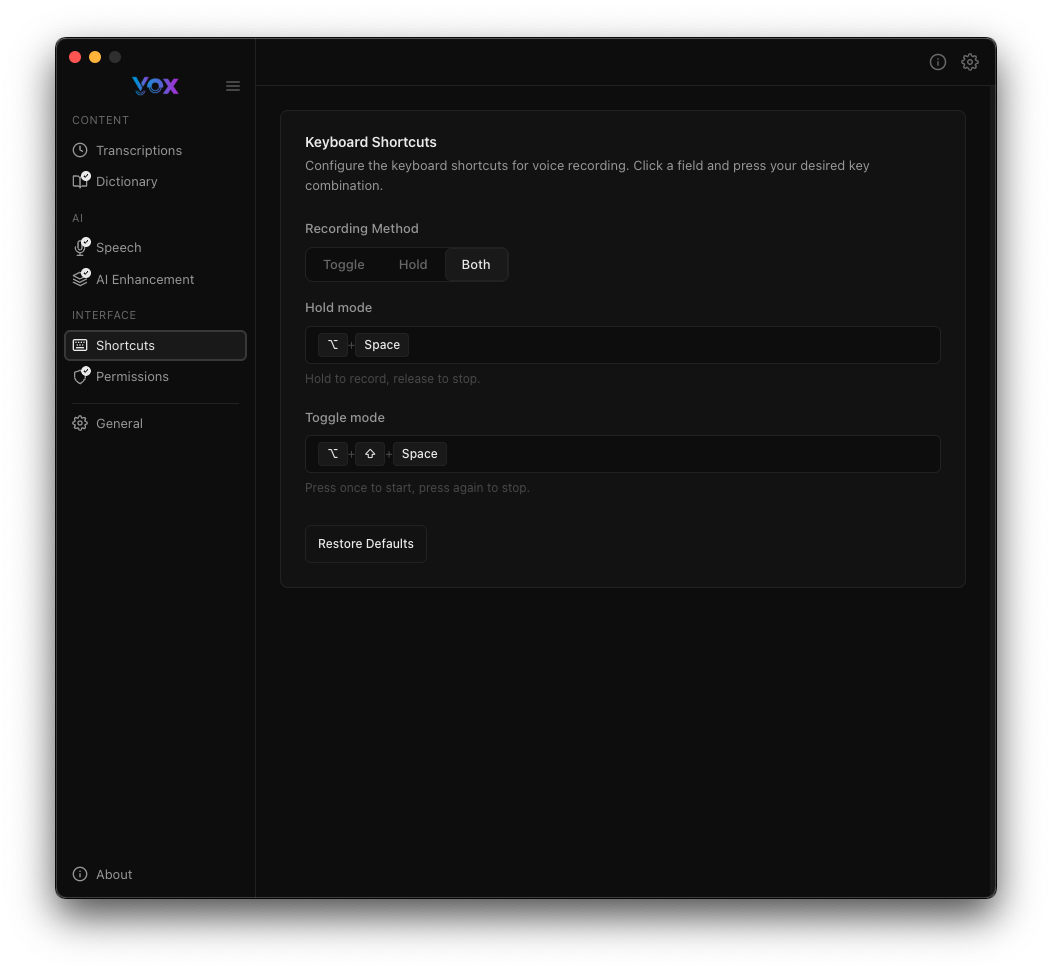
Default: ⌘ + Space
How it works:
- Press and hold the shortcut
- Recording starts
- Speak your message
- Release the key
- Recording stops and transcribes
Best for:
- Quick, short messages
- Inline comments while coding
- Single-sentence notes
- When you want precise control over start/stop
Advantages:
- Natural start/stop control
- No chance of forgetting to stop
- Immediate feedback
Toggle Mode
Default: ⌘ + ⌥ + Space
How it works:
- Press the shortcut once
- Recording starts
- Speak your message (hands-free)
- Press the shortcut again
- Recording stops and transcribes
Best for:
- Longer dictation
- Multi-sentence content
- When you need hands free
- Continuous recording without holding a key
Advantages:
- No hand fatigue from holding keys
- Can use hands while speaking
- Better for longer recordings
Choosing a Mode
Use Hold mode for quick voice commands. Use Toggle mode for longer dictation or when you need your hands free.
Recording Quality Tips
Microphone Setup
Position:
- Keep microphone 6-12 inches from your mouth
- Position slightly off-axis to reduce plosives (p, b, t sounds)
- Use a consistent position for reliable results
Environment:
- Record in a quiet room
- Close windows to reduce outside noise
- Turn off fans or air conditioning if possible
- Use a headset microphone for best results
Test your setup:
- Navigate to Settings → Permissions
- Click Record for Test
- Verify audio quality
- Adjust microphone position as needed
Speaking Technique
Pace:
- Speak at a natural, conversational pace
- Don't rush - Whisper handles normal speed well
- Pause naturally between thoughts
Clarity:
- Enunciate clearly but naturally
- Avoid mumbling or speaking too quietly
- Project your voice slightly
Content:
- Speak complete thoughts
- Use natural sentence structure
- Punctuation is inferred automatically (with AI Enhancement)
Background Noise
Minimize noise:
- Close doors and windows
- Turn off nearby fans or appliances
- Mute notifications on other devices
- Use a quiet room
If noise is unavoidable:
- Use a directional or noise-canceling microphone
- Speak closer to the microphone
- Use a larger speech model (Accurate or Best)
- Enable AI Enhancement to clean up transcriptions
Transcription Output
Where Text Appears
By default, transcribed text is:
- Pasted directly into the active application (requires Accessibility permission)
- Copied to clipboard (if Copy to clipboard is enabled)
- Saved in Transcription history
Text Formatting
Configure formatting in Settings → General → Transcription Preferences:
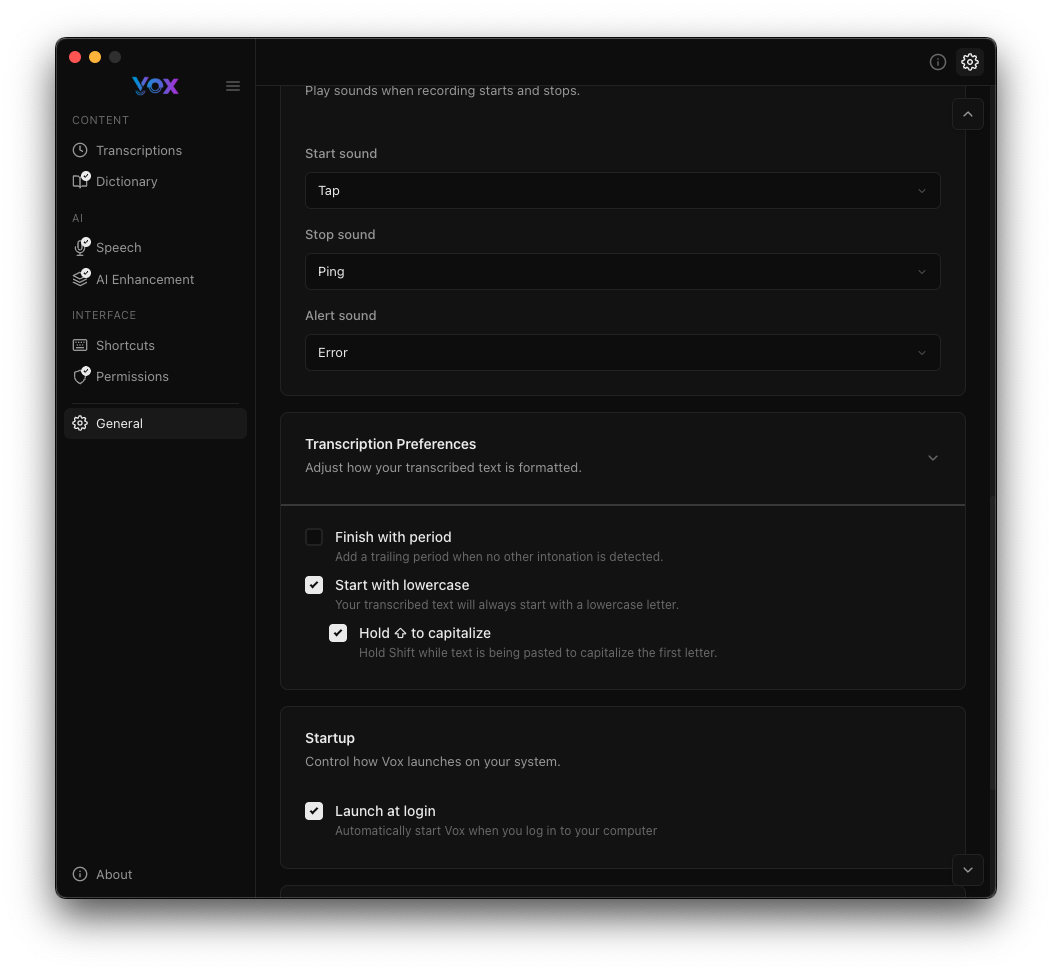
Finish with period:
- Automatically adds a period at the end
- Useful for sentence completion
Start with lowercase:
- Begins transcription with lowercase letter
- Good for inline comments or continuing sentences
Hold Shift to capitalize:
- Press Shift while recording to capitalize the first letter
- Overrides lowercase setting
Post-Processing
If AI Enhancement is enabled:
- Text is post-processed by an LLM
- Grammar and filler words are fixed
- Output is polished and professional
- Custom prompts can modify behavior
Recording Shortcuts Comparison
| Feature | Hold Mode | Toggle Mode |
|---|---|---|
| Default Shortcut | ⌘ + Space | ⌘ + ⌥ + Space |
| Start Recording | Press and hold | Press once |
| Stop Recording | Release key | Press again |
| Hands Free | ❌ No | ✅ Yes |
| Best For | Quick phrases | Longer dictation |
| Risk of Forgetting to Stop | ❌ No | ⚠️ Possible |
| Customizable | ✅ Yes | ✅ Yes |
Both shortcuts can be fully customized to your preference.
Troubleshooting
Recording Doesn't Start
Solutions:
- Check Microphone permission is granted
- Verify keyboard shortcut isn't conflicting with other apps
- Test with the tray icon menu instead
- Restart Vox
No Audio Captured
Solutions:
- Check System Preferences → Sound → Input for correct microphone
- Test microphone in another app (Voice Memos)
- Verify microphone isn't muted
- Check Vox has microphone permission
- Try Record for Test in Settings → Permissions
Transcription Doesn't Paste
Solutions:
- Grant Accessibility permission
- Ensure cursor is in a text field
- Try pasting manually with
⌘ + V - Enable Copy to clipboard as fallback
HUD Doesn't Appear
Solutions:
- Check Settings → General → HUD
- Enable Always show HUD for testing
- Verify HUD isn't off-screen (reset position)
- Restart Vox
Recording Stops Immediately (Hold Mode)
Solutions:
- Ensure you're holding the key, not tapping
- Check keyboard shortcut isn't bound to other apps
- Try a different keyboard shortcut
- Test with Toggle mode instead
Recording Won't Stop (Toggle Mode)
Solutions:
- Press the toggle shortcut again
- Click the tray icon → Stop Recording
- Check HUD for status
- Restart Vox if it's unresponsive
Poor Audio Quality
Solutions:
- Move closer to microphone
- Reduce background noise
- Use a better microphone (headset recommended)
- Download a larger speech model
- Enable AI Enhancement
Advanced Features
Audio Retention
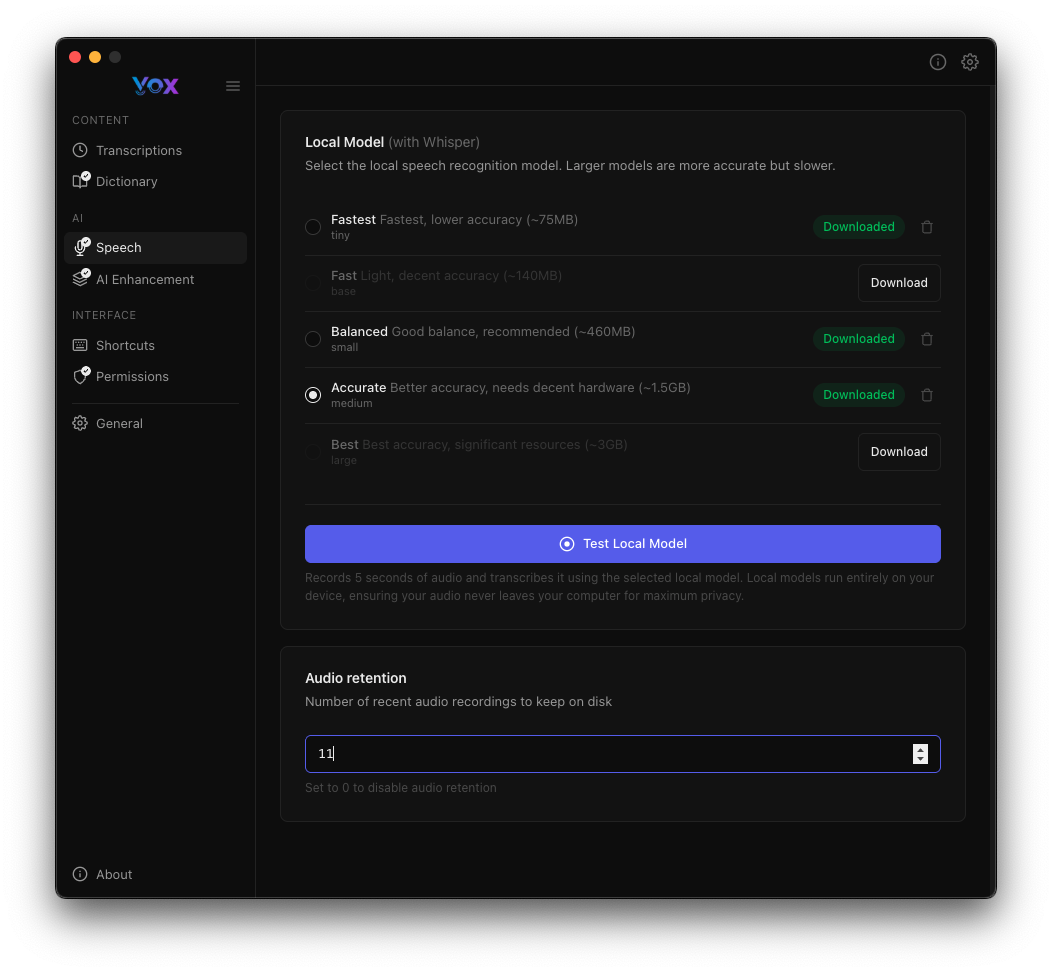
Vox keeps recent audio recordings for review:
- Default: 10 recordings
- Stored locally on your device
- Used for reviewing and debugging
Configure in Settings → Speech → Audio retention.
Keyboard Shortcuts While Recording
While recording is active:
Esc: Cancel recording (discards audio)- Shortcuts can be combined with Shift to capitalize
Recording from Different Applications
Vox works with any application that accepts text input:
- Text editors (VS Code, Sublime, Vim)
- Note apps (Obsidian, Notion, Apple Notes)
- Browsers (email, forms, messaging)
- Communication tools (Slack, Discord, Messages)
- IDEs (Xcode, IntelliJ, PyCharm)
Next Steps
- Customize keyboard shortcuts for faster recording
- Configure HUD appearance for better visibility
- Download speech models for better accuracy
- Enable AI Enhancement for polished transcriptions
- View transcription history to review past recordings